Creating a gallery wall is an exciting way to showcase your personality and artistic style within your home.
Whether you’re a seasoned art collector or just starting your decor journey, a gallery wall can transform a blank space into a vibrant visual story.
This guide will walk you through the steps of mastering gallery walls, allowing you to harmoniously blend different art pieces, photos, and personal mementos. You’ll learn how to cultivate an artistic arrangement that reflects your unique taste, turning your wall into a stunning centerpiece of your home decor.
Contents
- Step 1: Choose Your Theme
- Step 2: Select Your Artwork
- Step 3: Plan Your Layout
- Step 4: Hang Your Art
- Step 5: Add Finishing Touches
- Step 6: Keep It Dynamic
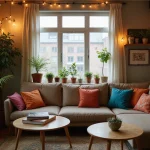
Step 1: Choose Your Theme
Before you start hanging art, it’s vital to decide on a theme for your gallery wall.
Your theme sets the tone and ensures that all pieces work together cohesively. Consider whether you want a modern, eclectic, vintage, or minimalist style. Each theme offers a unique vibe and can be tailored to your personal taste. For example, a nature-themed gallery wall might include botanical prints and landscape photography, while a family-focused theme could showcase cherished memories in stylish frames.
Here are some tips to help you choose:
– Color Palette: Select a color scheme that complements your room. Soft pastels can create a calming atmosphere, while bright, bold colors can energize the space.
– Art Types: Mix mediums like paintings, prints, and photographs for a dynamic look. Mixing textures adds depth to your display.
– Personal Touches: Incorporate personal items such as travel souvenirs or handmade crafts that tell your story and make the wall truly yours.
Unique Insights:
– Create a mood board to visualize your theme and color palette before you begin.
– Remember, the theme can evolve over time, so don’t be afraid to change things up as your tastes develop!
This step is crucial because it creates a strong foundation for your gallery wall.
For a cohesive look, consider these products:
– Themed art print sets, Color-coordinated frames, Mood board supplies, Art display hanging systems.
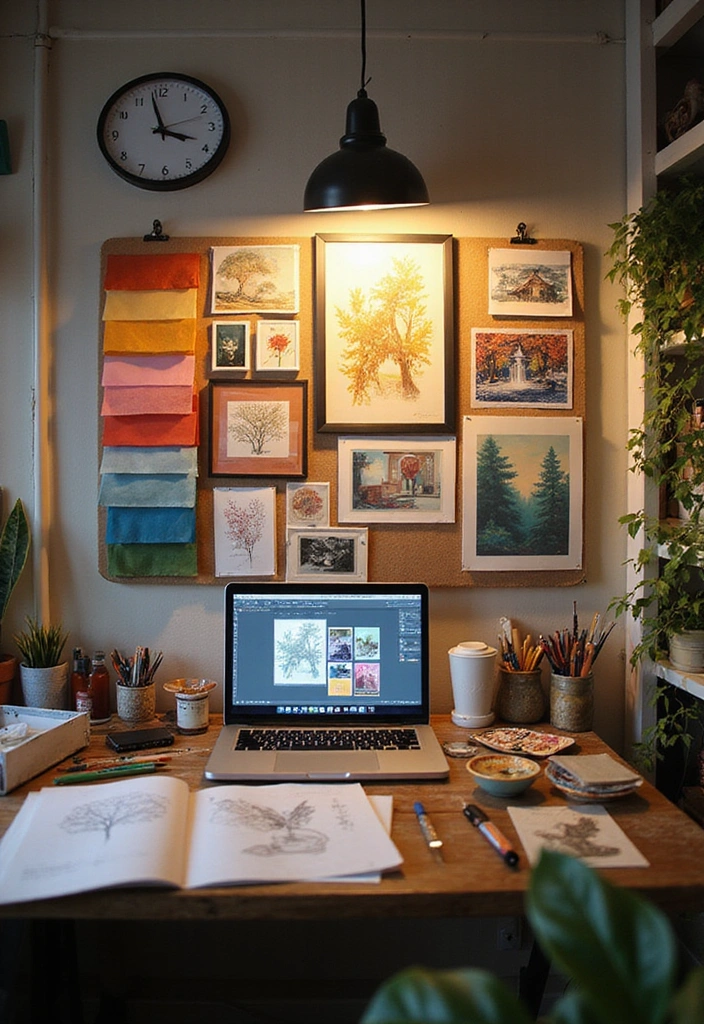
Step 2: Select Your Artwork
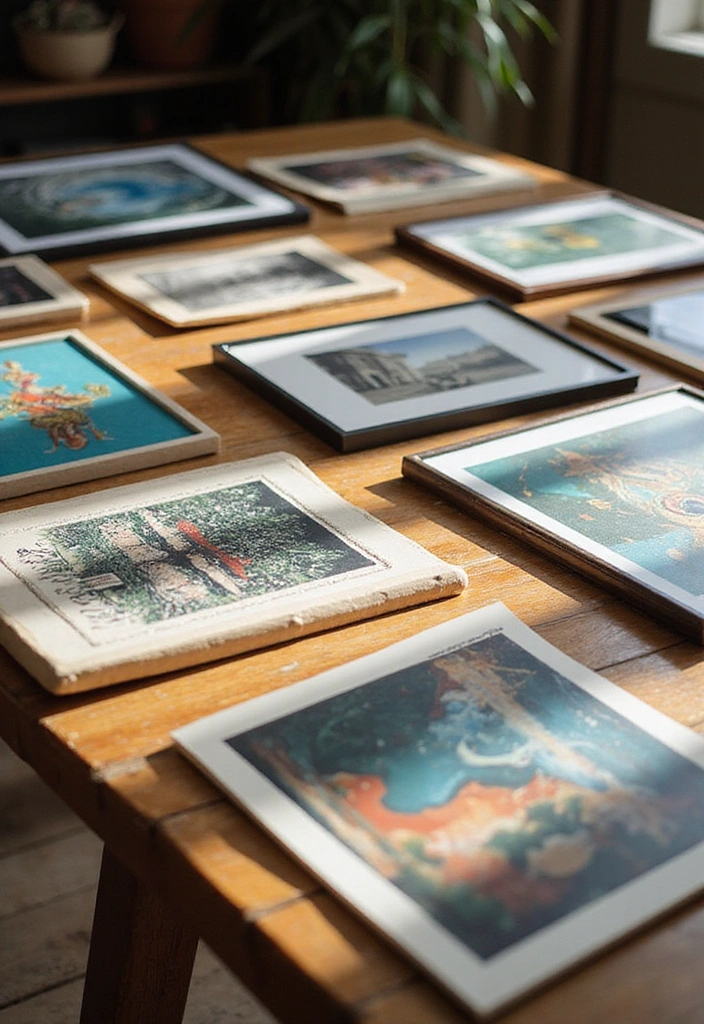
Once your theme is defined, it’s time to select the artwork that will grace your gallery wall.
Choose pieces that resonate with you personally, as they will bring joy to your space every day. Consider visiting local art fairs, galleries, or even online platforms to find unique pieces. You can also use prints of famous artworks to add a touch of sophistication without breaking the bank.
Here are some suggestions to curate your collection:
– Diversity: Include a variety of pieces such as paintings, photographs, and prints. This will create visual interest and keep the eye moving across the wall.
– Size Matters: Mix large and small pieces to create an engaging layout. A large statement piece can anchor the wall, while smaller pieces can fill in the gaps.
– Framing: Choose frames that match or complement your theme. For a rustic look, consider wooden frames; for a modern vibe, sleek metal frames work best.
Unique Insights:
– Consider creating your own art! Personal creations can add a special touch and make your gallery wall even more meaningful.
– Don’t shy away from using unexpected items, such as fabric pieces or three-dimensional objects, to add dimension.
For selecting artwork, check out these products:
– Art prints, Framing kits, Canvas art supplies, Online art marketplace memberships.
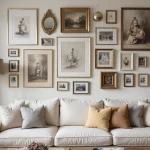
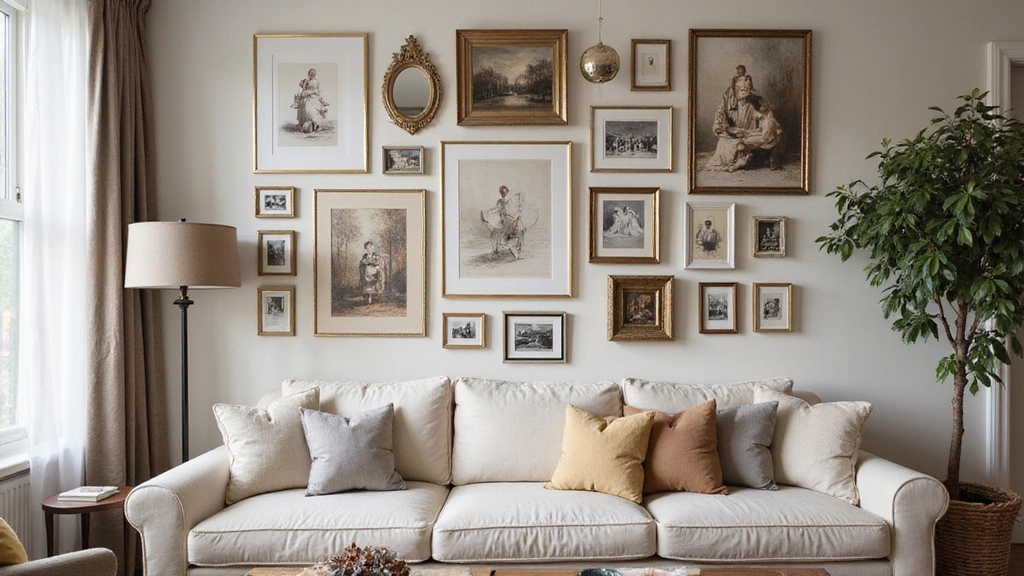
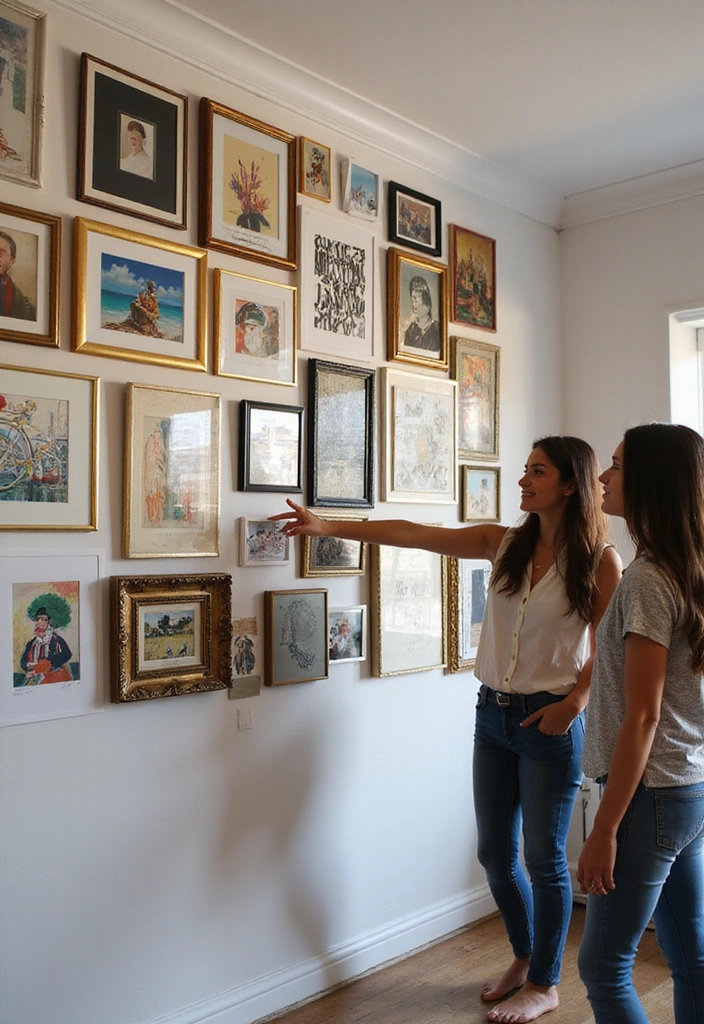
Step 3: Plan Your Layout
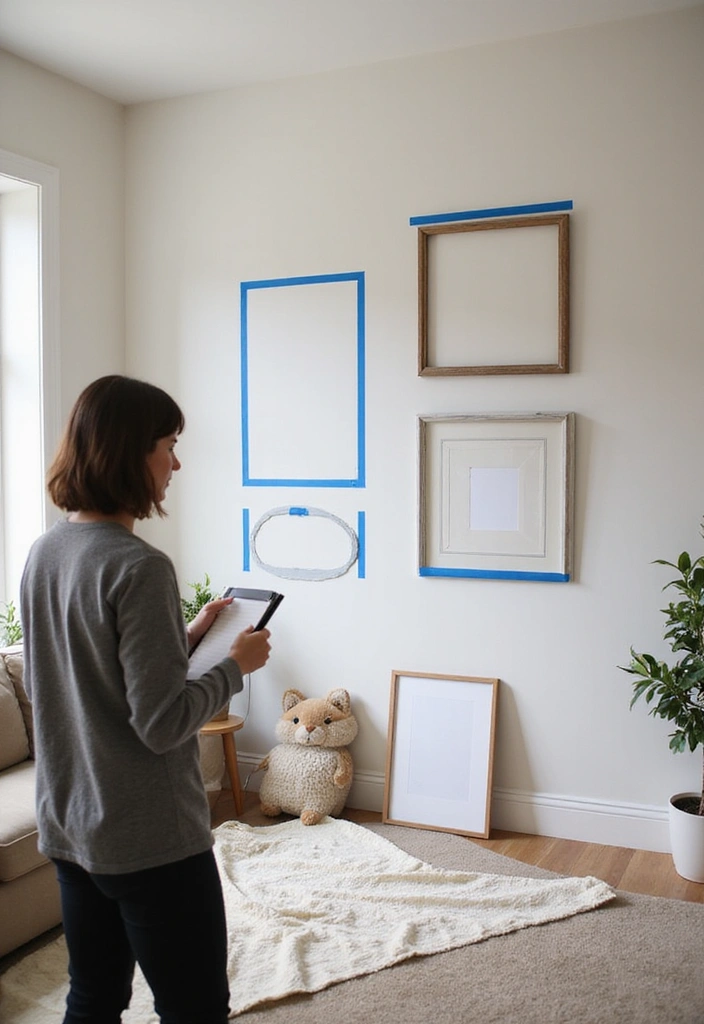
With your artwork selected, the next step is to plan your layout before putting any holes in the wall.
A well-thought-out arrangement is the key to a successful gallery wall. Start by laying out your pieces on the floor to visualize how they will look together. Experiment with different configurations until you find one that feels balanced and visually appealing.
Here are some effective layout strategies:
– Grid Layout: This structured approach creates a clean and organized look. Use equal-sized frames in a symmetrical arrangement.
– Salon Style: Mix and match different sizes and styles in a more casual, eclectic arrangement. This allows for more creativity and personalization.
– Thematic Grouping: Cluster pieces that share a common theme or color to create a cohesive look while still allowing for variety.
Unique Insights:
– Use painter’s tape to outline the frames on the wall before hanging them. This helps visualize spacing and overall design.
– Take a step back frequently while arranging to ensure it feels balanced from all angles.
Planning your layout is essential for ensuring that each piece shines in its own right while contributing to the overall aesthetic.
For planning your layout, consider these products:
– Painter’s tape, Layout templates, Leveling tools, Gallery wall planning apps.
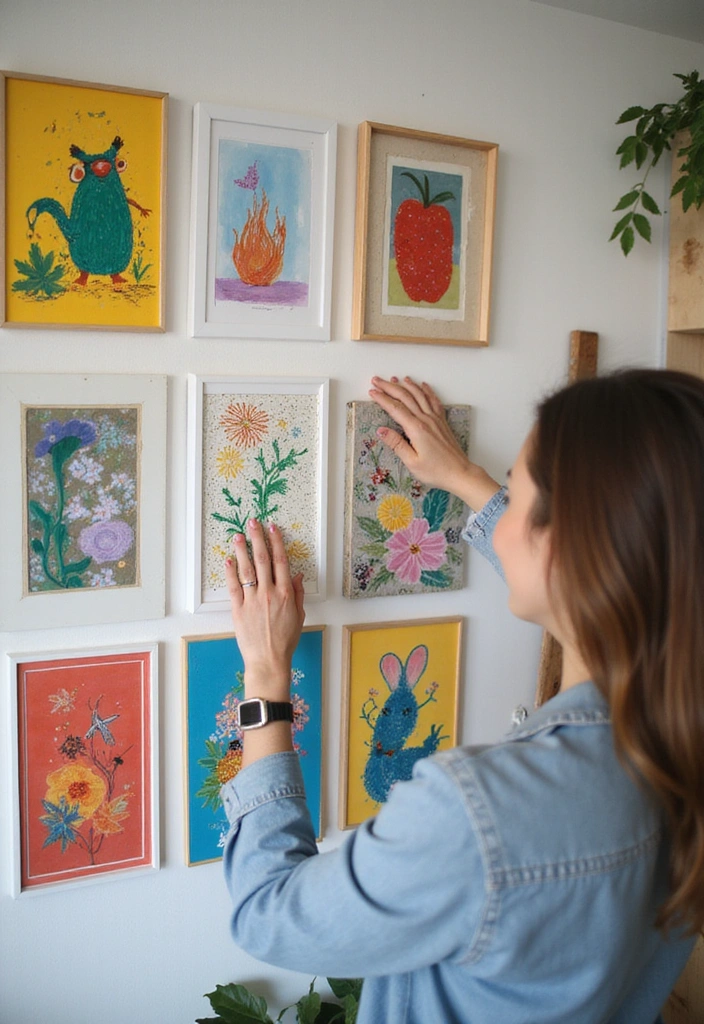
Step 4: Hang Your Art
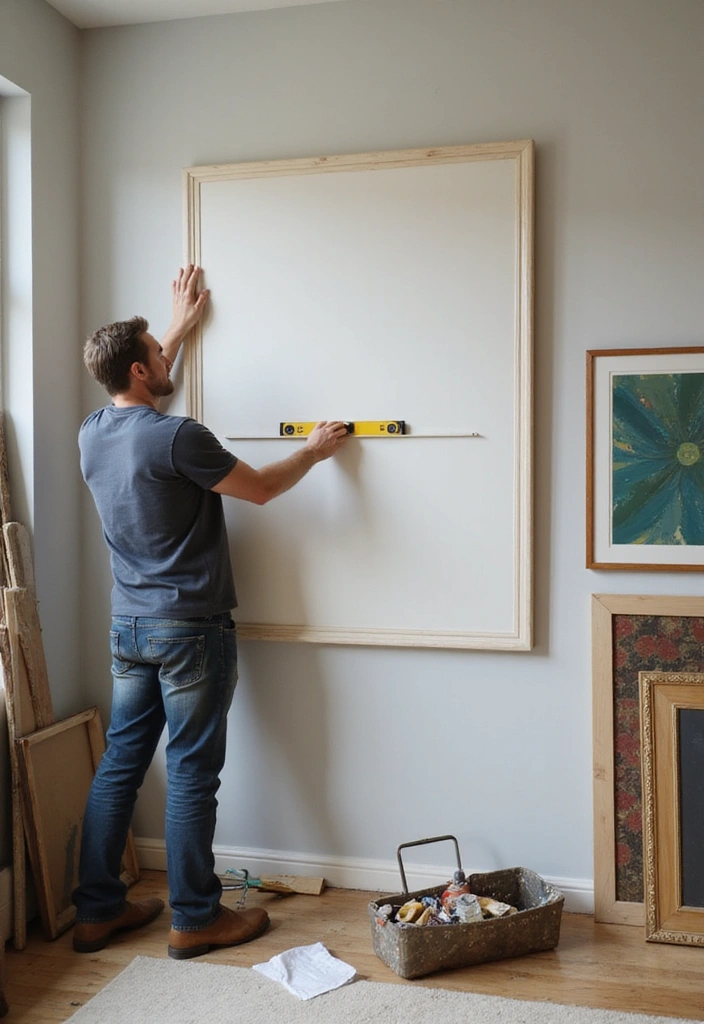
Now comes the exciting part: hanging your art!
With your layout planned, it’s time to put your vision on the wall. Start with your largest piece, as it will serve as the anchor for your arrangement. Use a level to ensure it’s straight, and mark the spot for your hanging hardware. For heavier pieces, wall anchors might be necessary to keep everything secure.
Here are some tips for a successful hanging process:
– Start at Eye Level: Hang artwork at eye level for the best viewing experience. The center of the gallery wall should be around 57 to 60 inches from the floor.
– Use a Template: If you’re unsure about placement, create a paper template of each piece and tape it to the wall before hanging.
– Spacing: Keep consistent spacing between the pieces, generally around 2 to 4 inches, to create harmony.
Unique Insights:
– Consider using removable wall hooks for a damage-free hanging option, especially if you like to change your art often.
– Don’t rush the process; take your time to ensure each piece is perfectly placed.
Hanging your art can be a fun and rewarding process that brings your gallery wall to life!
For hanging your art, check out these products:
– Picture hanging kits, Wall anchors, Level tools, Removable wall hooks.
Step 5: Add Finishing Touches
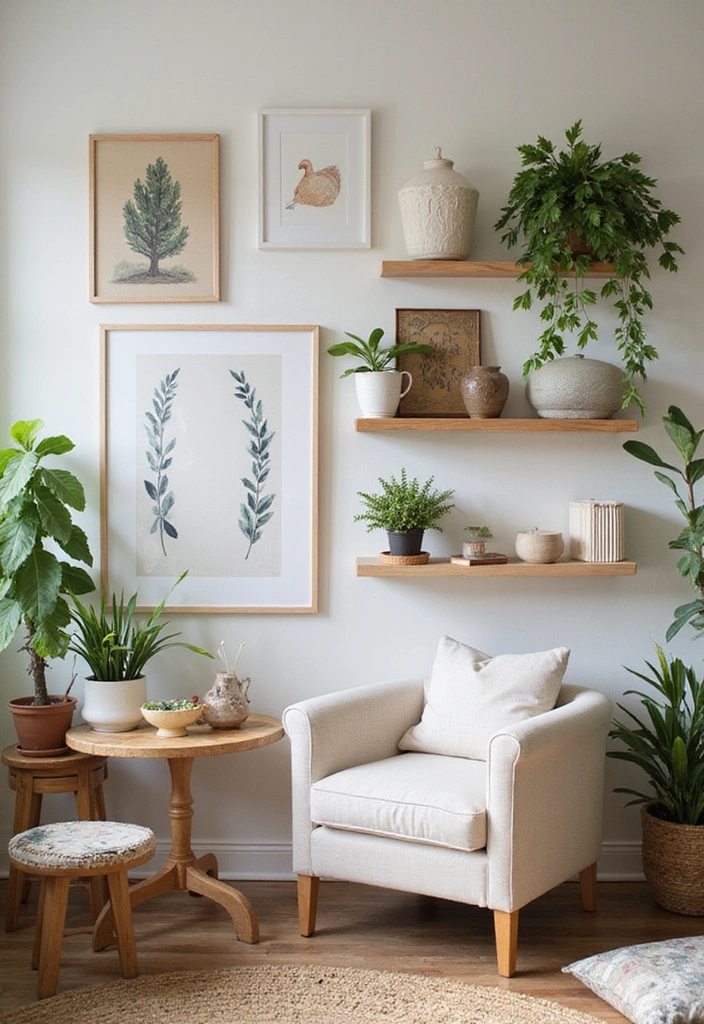
After all your artwork is hung, it’s time to add the finishing touches that will elevate your gallery wall.
This is where you can unleash your creativity and personalize the space further. Consider adding decorative elements that complement your artwork, such as shelves, plants, or lighting.
Here are some ideas to enhance your gallery wall:
– Floating Shelves: Incorporate floating shelves to showcase smaller art pieces or decorative items like books and plants.
– Lighting: Use picture lights or wall sconces to illuminate your artwork, enhancing its visual appeal.
– Wall Decor: Add decorative elements like mirrors, wall hangings, or 3D objects to create depth and variety.
Unique Insights:
– Consider seasonal decor changes to keep your gallery wall feeling fresh and exciting.
– Use plants to bring life to your wall; trailing plants can add a beautiful, organic touch.
Adding these finishing touches will ensure your gallery wall stands out and makes a lasting impression.
For finishing touches, consider these products:
– Floating shelves, Picture lights, Decorative mirrors, Indoor plants.
Step 6: Keep It Dynamic
Your gallery wall doesn’t have to be static; keeping it dynamic can be a fun way to refresh your space.
Consider rotating artwork or changing up frames and decor to reflect the seasons or your evolving taste. This keeps the display feeling fresh and engaging, allowing for personal growth and experimentation.
Here are some ways to keep your gallery wall dynamic:
– Seasonal Changes: Swap out artwork or add seasonal decor items to keep the wall relevant and exciting throughout the year.
– New Finds: Whenever you acquire new art pieces, integrate them into your gallery wall, allowing it to evolve over time.
– Theme Shifts: Don’t hesitate to shift your theme completely! It can be a fun way to reimagine your space.
Unique Insights:
– Photograph your gallery wall before and after changes to track your creative journey.
– Invite friends over to help with changes; it can be a fun and social activity!
Keeping your gallery wall dynamic ensures it remains a source of inspiration and joy in your home.
For maintaining a dynamic gallery wall, check out these products:
– Seasonal decor items, Art rotation kits, Decorative storage boxes, Photo albums.
Conclusion: Celebrate Your Unique Style
Congratulations! You’ve successfully mastered the art of gallery walls, creating a stunning display that reflects your unique style.
Remember, your gallery wall is a personal expression of your journey and tastes, so embrace it fully. Don’t hesitate to continue experimenting and evolving your wall as you discover new art and inspirations. Share your gallery wall with friends and family, and let it spark conversations and joy in your home.
Happy decorating!